
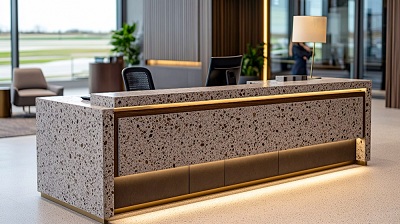
Granite countertops are a practical and stunning contribution to any kitchen or bathroom. They are not only gorgeous surfaces but granite countertops also make the space they are installed in much more useful and durable. Although this amazing stone can maintain its beauty and withstand daily wear and tear for decades, helping it along the way will make your home look much more put together and sophisticated.
Maintaining the high-shine, glossy look of the countertops requires a bit of care and attention. Learning how to polish granite countertops will make all of the difference in your countertops maintenance routine.
Why Polish Granite Countertops?
Granite countertops are an eye-catching and beautiful centerpiece of any home. They are admired for their natural elegance and sophistication. However, despite its toughness, granite can lose its shine over time. Therefore, polishing the countertops is an easy and straightforward step that needs to be done regularly to restore some luster to the stone.
Similar to polishing a prized piece of jewelry or silverware, polishing the countertops will provide it with the care it deserves and it will help the countertops look stunning for years to come.
Polishing the countertops not only enhances their aesthetic appeal but also adds an outer layer of protection on the countertops that will protect the stone against scratches and stains. As granite is a naturally porous stone, it is susceptible to outside factors such as dirt and debris penetrating the stone and causing discoloration. By polishing the stone, you are creating a protective barrier between the stone and the outside world, thus making it impossible for spills and particles to harm the countertops.
Items You’ll Need
Before starting the polishing process it is important to gather all of the necessary tools and materials you will need. Some of these are items you most likely already have at home such as mild dish soap, spray bottles, soft cloths, and microfiber towels. On the other hand, some of them are things you will need to acquire such as granite polish, a buffing pad granite sealer, and rubber gloves.
Preparing and gathering the items beforehand will make the polishing process go smoothly. You won’t have to look around trying to locate them while polishing the stone. An efficient process will allow you to focus on the task of polishing the countertops without interruption or disruption.
Steps for Polishing Granite Countertops
Following these easy steps on how to polish granite countertops will make the polishing process much easier to accomplish.
Step 1: Cleaning the Countertops
The first and foremost step of polishing your gorgeous granite countertops is to thoroughly clean the surface of any possible dirt and debris. Any dirt, oil, grease, food particles, or bacteria will interfere with the polish and it will lessen its protective properties. Therefore, it is essential to start with a clean slate.
You can begin the cleaning process by mixing some mild dish soap with warm water in a spray bottle. Mixing them in a stray bottle will make the mixture easier to apply on the surface of the countertops. Then, you can wipe the countertops with a soft clean cloth using circular motions. Once the surface is clean, rinse the area with a cloth soaked with just water to get all of the soap off the countertops. As the last step, dry the countertops thoroughly with a microfiber cloth to prevent any water marks.
Step 2: Applying the Polish
Now that your countertops are clean and dry, you can move on to applying the polish. Start with choosing a polish that fits in with your needs. You can opt for a commercial polish that is designed specifically for granite countertops or you can also try a homemade mixture made with baking soda.
Apply a small amount of polish to the surface and spread it evenly using circular motions. Remember to use a soft cloth or pad during this process to avoid any damage to the stone. After evenly applying on the surface, allow it to sit for a few minutes so it can penetrate the stone and do its job. A few minutes later the polish should be set into the stone and you can remove any access with a dry cloth. Once the polishing is done, you will be left with a bright and vibrant surface.
Step 3: Buffing the Surface
Buffing the surface might seem unnecessary but it is one of the steps that will truly transform the beauty of your granite countertops. Buffing will give the stone a high-gloss, mirror-like finish and they will be the centerpiece of your home.
You can use a buffing pad to buff the surface using circular motions. Start with one small corner of the countertops and make your way all around the surface. Make sure that you are applying even pressure throughout the stone for an even finish. You can periodically check your progress to see if you are happy with the shine levels.
Once the buffing is over, take a close look throughout the surface and see if there are any uneven areas. If there are any dull spots you can buff those some more.
Step 4: Sealing the Granite
Sealing the granite is another important step for preserving its beauty and durability. Selling your countertops is a highly recommended step for granite as it is a porous stone, therefore it is susceptible to damage that can be caused by moisture and dirt. Moreover, sealing the countertops will make them more hygienic as it will disallow bacterial growth.
Choose a high-quality sealer that is made for granite, or at the very least natural stones. Apply the sealer evenly on the countertops. Apply only a thin layer and allow it is sink into the stone. Once it has time me sink in and settle, you can once again wipe the excess off with a dry cloth.
Step 5: Inspection
After the polishing and sealing processes are finished, it is time to do the final touches so that the whole project is complete and your countertops look their best. Look over the whole surface of the countertops closely and carefully. Try to see if there are any inconsistencies between the shine levels. Uneven sealer application can result in very slight bumps on the countertops.
Try to look for any of these mistakes. If you find any you can give them another round of buffing or more polish depending on the issue. If there are none, you can wipe the countertops once more to get rid of lingering residue.
Common Mistakes
Polishing granite countertops is a pretty straightforward process overall. However, there are a few details you should pay attention to as they can impact the final results.
One important mistake to avoid is using cleaners that are too harsh for a natural stone like granite. This is because they can damage the surface of the stone over time. You won’t notice this after using them once or twice, but the damage will be there. Similarly using abrasive tools or materials will have the same unfortunate results.
Instead you should opt for gentle, pH-balanced cleaning supplies, preferably ones designed specifically for natural stones.
Another common mistake is to skip the cleaning step altogether. If you skip this step, any residue, food particles, or dirt that is stuck on the countertops will be trapped underneath the polish. This will result in an imperfect finish and once it is done, you won’t be able to fix it.
Using too much polish can result in a cloudy or streaky appearance. Don’t forget that a little goes a long long way, work in small sections and apply only small amounts of polish. If the spot isn’t polished enough you can always add more.
In short, polishing granite countertops is a process that will enhance the natural beauty of the stone. Following these easy steps on how to polish granite countertops will help you accomplish the project and protect the countertops from damage. Regularly polishing your countertops will ensure that the surface remains stunning, adding durability and practicality to your home.